Replace macOS Sierra Login Screen Image (Without Blur)
Nov 17, 2016
Simple instructions on how you can replace the macOS Sierra login screen/desktop image with one of your choosing, and without the blur effect.
If you have a custom login screen image on your Mac (the image that shows as the desktop before anyone logs in) it's likely to get removed and replaced with a very blurry default image each time you update your OS. It seems like each new version of Mac OS X/macOS stores the login image in a different place, breaking any customization with each update.
Fortunately setting a new custom login screen is easy. And it has the added benefit of removing the extreme blur effect that Sierra likes to use.
a. Prepare The New macOS Login Screen Artwork
This is the most important step because macOS Sierra is really picky about what it will accept as the login desktop. If your new login image is the wrong size or format it will simply disappear, replaced with a very blurry default desktop image.
You need a png file that is 1920 pixels wide and 1080 pixels high. Nothing else will work.
The easiest way to create such a file is to open a high resolution image (one larger than 1920×1080 pixels) in Photoshop and...
- select the rectangular marquee tool from the top left
- select the style "fixed ratio" from the upper middle
- set the height to 192 and the width to 108
- select the part of the image that you want to serve as your new login image
- choose Image > Crop
- select File > Export > Save For Web (Legacy)...
- set the preset (upper right) as PNG-24
- set the size as 1920 pixels wide and 1080 pixels high
- click save
- set the name to com.apple.desktop.admin.png
- check the name – if it's not exact it won't work. Cut. Paste.
- save to your desktop
- open the new image in ImageOptim
Your image is now ready to act as your new login artwork.
It's worth noting that macOS is not going to add any blur effect using this method, so if you want your login artwork to appear blurry (presumably to obscure details from someone looking at the Mac while it was locked) you'll need to add the blur effect yourself. Generally the easiest time to do thesis between steps 5 and 6 above. Choose Filter > Blur > Gaussian Blur... and then adjust the slider until you like the amount of blur.
b. Get Your New Mac Login Artwork Into Position
macOS Sierra looks for login screen artwork of a certain size/format in a specific place. Now that you have the correct size/format you just need to get it into the right place.
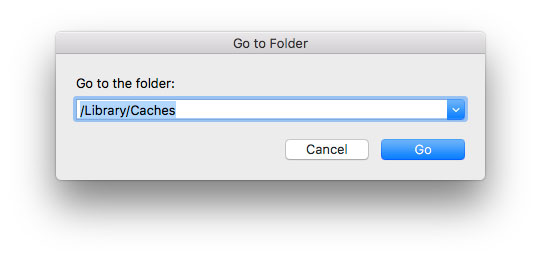
In the finder choose Go > Go To Folder... and enter the text /Library/Caches . It should look exactly like this:
In there you are likely to find two items, but we only care about the one called com.apple.desktop.admin.png. That is the one we need to replace. You can see it here.

Drag the existing com.apple.desktop.admin.png file to the trash. Option-Drag (this is important, we want to move a copy of your new file) your new login screen artwork from the desktop into the place it previously held.
c. Test The New Artwork
Choose the Apple icon in the top left and select Log Out. That should take you back to the login screen. If the previous steps worked you will see your new, non-blurred artwork in place.
If you see anything else, usually an extremely blurry generic desktop type image, it means that macOS Sierra did not like your new image file – either the size for format was wrong. It will have deleted it and put a new image in place – this is why we moved a copy into the Cache folder, not the original.
Check the size and format of your file and try again.
Related Content
Apple Remote Desktop: Fix "Authentication failed to" Error
How To Securely Hide (and Encrypt) Files On Mac OS X
Security Through Obscurity On Mac OS X – Better Solutions
Showing Hidden Files vs Hiding Regular Files in Mac OS X
Category List
Tag List
Interface Design (7)
Security (33)
Toronto (11)
Influence & Persuasion (12)
Graphic Design (4)
Google Authenticator (5)
Arduino (7)
Pricing (19)
Litecoin (3)
Multi-Factor Authentication (5)
Concrete5 (1)
Technology (1)
Digital Security 2014 (10)
Mac OS X Server (11)
Two-Factor Authentication (5)
SAF (Society of American Florists) (5)
Support Main Street (12)
Mac OS X (5)
Bitcoin (3)
Online Marketing For Florists (50)
Industrial Design (2)
Flower Buying Tips (23)
Floral Associations (27)
Shop Local (12)
Website Development (17)
FileMaker (18)
Examples of Florist Creativity (6)
Deceptive Order Gathering (10)
FloristWare (10)
Conventions, Conferences & Trade Shows (4)
Best Practices (32)
Floral Industry (4)
Website Cache – Prime & Load (5)
Floral Management Magazine (14)